Basic Info Bank Entries
The Info Bank was created to store all of your important information. It is where you will share things such as emergency contact numbers, school information, medical data and documents to which both you and your co-parent either want or need access.
In this tutorial:

Creating New Info Bank Entries
- In the main navigation menu, click Info Bank.
- Select the section for which you'd like to create an entry. The only two sections that require different steps for entries are Family Vitals and Health.
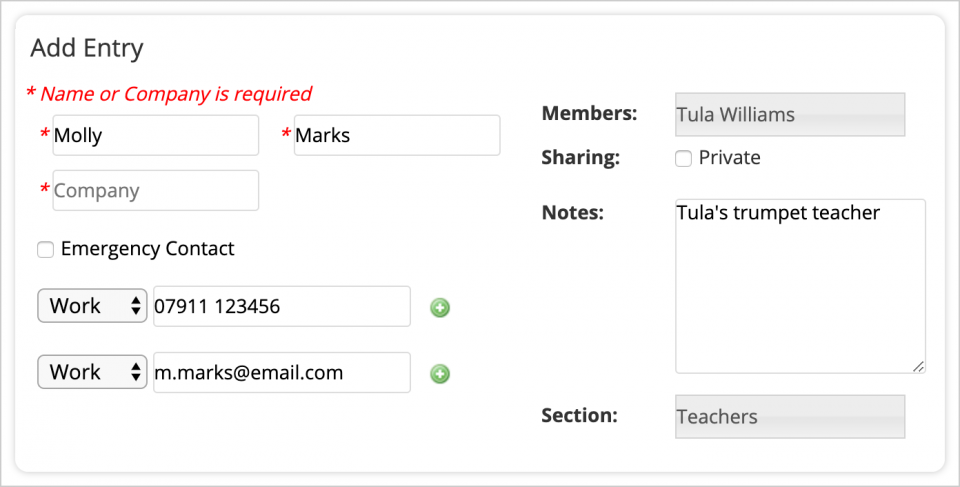
- Complete the mandatory fields. These include the first/last name or company title for the entry, and choosing a family member to associate the entry with. All other fields are optional.
- In the Members field, you can select one or multiple members of your family to associate this entry with. For example, if you are entering the contact details for your child's paediatrician, select your child(ren) who see this paediatrician.
- If you check the box for "Emergency Contact", this entry will be filed within your Emergency Contacts section for this family member.
- Check the box for "Private" if you wish to keep this entry viewable to only you. If left unchecked, it will be viewable to your co-parent.
- In the Sections part of the entry, you can add additional, important information and associate your entry with a particular section. For example, if you are creating an entry related to health insurance, scroll down to the Health Insurance fields. Here is where you can add details such as your policy number, co-pay information, etc. Note: Each entry can be associated with more than one section, if applicable.
- Once you have completed your entry, click Save.
Editing or Deleting Entries in the Info Bank
- In the main navigation menu, click Info Bank.
- Select the section that your entry is filed within. You can also go to “Address Book” to see a full list of your address book entries.
- Tap the entry to view it in detail. Note: You are only able to edit or delete address book entries that you created.
- Click Edit at the top of the window to edit the entry. Click Save to save your edits.
- Click Delete to delete your entry.